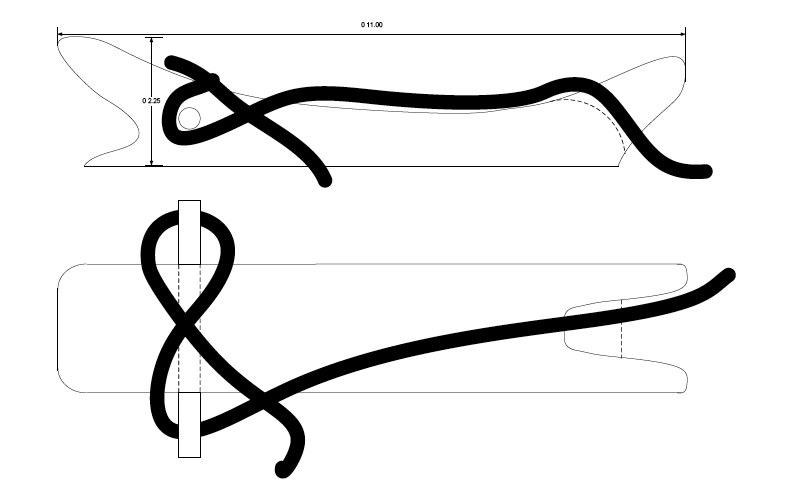
The plans for the TinyCat sailboat I built this summer call for a Jonesport mooring cleat right up on the stem of the boat. I decided that mine should be made of Texas mesquite. I took the plans, copied the profile (top and side views) and then used a photocopier to enlarge each image until it matched the sizes in the plans. Then I took those images as scans and used Visio to create a line-drawing that matched the enlarged drawing.
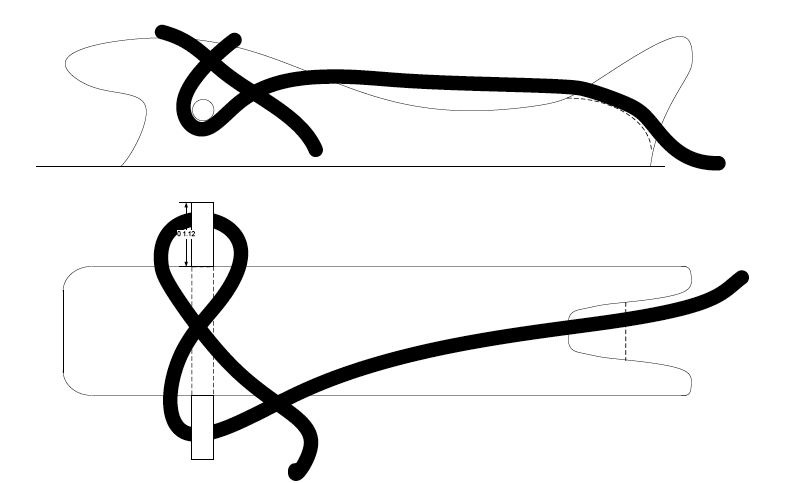
The plans are available in PDF and Visio formats. The thick black lines are intended to represent how a mooring line would flow over the curves. Not terribly pretty or even accurate, but it did help me see how they would be used.
I started with a large mesquite block and used a hand plane to get it fairly square. Then I cut out the profile I liked the most (there are two profiles included in the plans) and traced them onto the block with a pencil. Then I went to the bandsaw and with a ¼'' blade, cut a rough shape on the top, staying proud of the lines. I traced the side profile and cut that, too.
Then I used a block plane, several different files, a microplane and some sandpaper to shape the mooring cleat appropriately. I had a ½'' stainless dowel (pin?) that was going to become part of the cleat. The hole into which this would fit was bored on the drill press. When the pin was inserted, I used some Gorilla Glue to keep it in place.
Of the two profiles, the second one is my favorite and is the one that most closely matches what I ended up with.
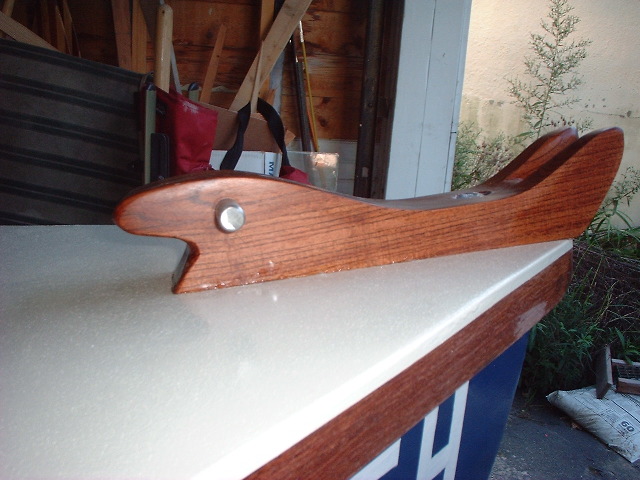
I finished up by giving it a coat of epoxy to soak into some of the cracks that appeared (mesquite trees usually have a fair number of branches). Following that, it received a couple of thinned coats of varnish followed by a couple of lighter (but full-strength) coats. The lag bolts used to secure it to the deck are stainless and in the 3+ inch range. One goes into the stem and the other into a 2''x6'' backing board.
The deck isn't completely flat; I placed some 150 grit sandpaper on the stem and scrubbed the mooring cleat against it until the profile of the cleat matched the shape of the deck. It wasn't much, but I felt better about it.
The entire mooring cleat is bedded in a thin layer of silicon caulk. The two lag bolts (and the fender washers) keep it nice and snug against the deck. I was able to be towed this summer by a huge power boat (never again!) with the tow rope belayed onto this cleat. It held perfectly.
